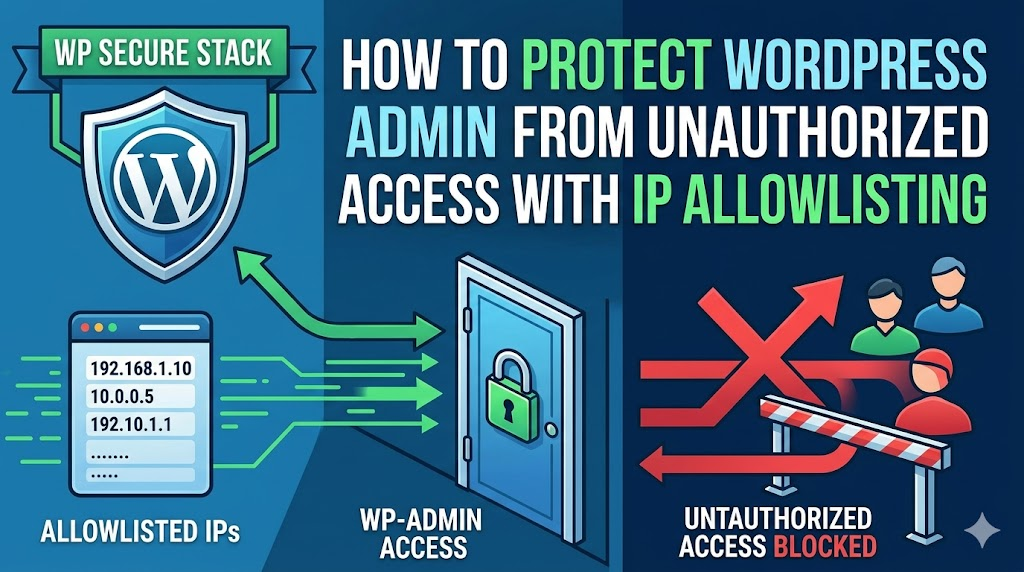
Unauthorized WordPress Admin Access attempts are one of the most common security issues affecting WordPress websites. Attackers often target the WordPress admin area (/wp-admin) and login page(wp-login.php) using brute force attacks, credential stuffing, or automated bots.
A simple and effective way to reduce this risk is IP allowlisting. This method restricts access to the WordPress admin area so that only specific trusted IP addresses can reach the login page.
Why WordPress IP Allowlisting Provides Superior Admin Security Protection
WordPress IP whitelisting creates an invisible security shield that most attackers cannot penetrate. Unlike password protection alone, IP restrictions block unauthorized users before they ever see your WordPress login page. Therefore, even if hackers possess stolen credentials, they cannot access your WordPress admin area without connecting from an approved IP address.
Moreover, this WordPress security strategy eliminates entire categories of attacks instantly. Automated bots scanning the internet for vulnerable WordPress sites receive immediate rejections when attempting to access your wp-admin directory. Subsequently, your server resources remain available for legitimate traffic instead of processing millions of failed login attempts.
In this guide, we show how to protect the WordPress admin dashboard using IP allowlisting.
💡 Quick Answer: How Do You Allowlist IPs for WordPress Admin?
The fastest way to restrict /wp-admin access by IP is to add a few lines to your .htaccess file (for Apache servers) or to use a plugin like WP Cerber Security or Wordfence. You tell WordPress which IP addresses are allowed, and everything else gets blocked automatically — no login page, no brute-force opportunity.#
Here is a quick overview of everything we cover in this guide:
- What Is IP Allowlisting and Why Does It Matter?
- Before You Start: Find Your IP Address
- Method 1: Restrict wp-admin Access via .htaccess (Apache)
- Method 2: Restrict wp-admin Access via nginx.conf (Nginx)
- Method 3: Use a Security Plugin for IP Allowlisting
- What to Do If You Lock Yourself Out
- How to Handle a Dynamic IP Address
- Common Mistakes to Avoid
- Frequently Asked Questions
What Is IP Allowlisting and Why Does It Matter? {#what-is-ip-allowlisting}
An IP address is the unique number assigned to any device that connects to the internet. When someone visits your WordPress site, your server can read that IP address and decide what to do with the request.
IP allowlisting (also called whitelisting) means you create an approved list of IP addresses. Only requests from those addresses can access a specific resource in this case, your WordPress admin area.
Every other IP address gets blocked at the server level, before WordPress even loads. That means:
- Brute-force attacks stop immediately. Bots cannot reach the login form, so they have nothing to attack.
- Credential stuffing becomes useless. Even stolen username/password combos cannot be tried.
- Your server spends less resources processing malicious login attempts.
This matters because /wp-admin and /wp-login.php are public by default on every WordPress installation. Anyone who knows you run WordPress knows exactly where your login page lives.
Before You Start: Find Your IP Address {#before-you-start}
Before you change anything, you need to know your own IP address. Blocking yourself out of your own admin panel is the most common mistake people make with this technique.
To find your current public IP address:
- Visit whatismyipaddress.com or search “what is my IP” in Google.
- Copy the IPv4 address (it looks like
203.0.113.45). - If you have team members who need admin access, ask them to do the same.
Important: If your internet service provider assigns you a dynamic IP address (one that changes periodically), read the How to Handle a Dynamic IP Address section before proceeding. Applying this restriction with a dynamic IP without a fallback plan is a recipe for getting locked out.
Method 1: Restrict wp-admin Access via .htaccess (Apache) {#method-1-htaccess}
This method works on any Apache-based hosting environment, which covers the majority of shared and managed WordPress hosts (SiteGround, Bluehost, Hostinger, and most cPanel setups).
Your .htaccess file sits in the root of your WordPress installation and controls how Apache handles incoming requests. We add rules there to protect the /wp-admin directory.
Step 1: Back up your .htaccess file
Before editing anything, download a copy of your current .htaccess file via FTP or your host’s File Manager. If something breaks, you can restore it in seconds.
Step 2: Create a new .htaccess inside the /wp-admin folder
Your main .htaccess is in the root directory. For this method, we create a separate .htaccess file specifically inside the /wp-admin/ folder so the rules only apply to the admin area.
Connect to your site via FTP (we recommend FileZilla) or use your host’s File Manager. Navigate to the /wp-admin/ directory and create a new file named .htaccess.
Step 3: Add your IP allowlist rules
Paste the following code into the new /wp-admin/.htaccess file. Replace the example IP addresses with your own:
order deny,allow
deny from all

# Your home IP
allow from 203.0.113.45

# Your office IP
allow from 198.51.100.22

# A team member's IP
allow from 192.0.2.88
Save the file and test it immediately by opening your admin panel in a browser. If you can still log in, the rules work correctly. If you get a 403 Forbidden error, double-check that you added your actual IP address to the list.
Step 4: Also protect wp-login.php
The /wp-admin/.htaccess approach covers the admin dashboard, but attackers can still reach wp-login.php directly (it sits in the root, not inside /wp-admin/). Add these lines to your root .htaccess file, directly above the # BEGIN WordPress line:
<Files wp-login.php>
  order deny,allow
  deny from all

  # Your home IP
  allow from 203.0.113.45

  # Your office IP
  allow from 198.51.100.22
</Files>
Expert Tip: Some themes and plugins make AJAX requests to wp-admin/admin-ajax.php. Blocking that file for all IPs breaks front-end features. The separate /wp-admin/.htaccess method protects the admin panel without touching admin-ajax.php, so front-end functionality continues to work correctly
Method 2: Restrict wp-admin Access via nginx.conf (Nginx) {#method-2-nginx}
If your host runs Nginx (common on cloud VPS setups like DigitalOcean, Cloudways, or Kinsta), the .htaccess method does not apply. Instead, you add a location block to your Nginx server configuration.
Step 1: Open your Nginx config file
On most Linux servers, your site configuration lives at:
/etc/nginx/sites-available/your-domain.comConnect via SSH and open the file with a text editor:
sudo nano /etc/nginx/sites-available/your-domain.comStep 2: Add the location block
Inside your server {} block, add the following before your main location / block:
location ~* ^/wp-(admin|login\.php) {
    allow 203.0.113.45;
    allow 198.51.100.22;
    deny all;
}
Step 3: Test and reload Nginx
Always test your configuration before reloading to catch syntax errors:
sudo nginx -t
sudo systemctl reload nginx
If nginx -t reports errors, review your syntax carefully before reloading.
Method 3: Use a Security Plugin for IP Allowlisting {#method-3-plugin}
If editing server config files feels risky, a security plugin handles IP allowlisting through a user-friendly WordPress dashboard interface — no FTP or SSH required.
Option A: WP Cerber Security (Best for Fine-Grained Control)
WP Cerber Security is a dedicated WordPress security plugin with a built-in Access List feature. It lets you allowlist IP addresses (or entire subnets) specifically for the login page and admin area.
How to set it up:
- Install and activate WP Cerber Security from the WordPress plugin directory.
- In your dashboard, go to WP Cerber → Main Settings.
- Scroll to the Access Lists tab.
- Under White IP Access List, enter each approved IP address on a new line.
- Enable the option “Allow dashboard access from White IP List IPs only”.
- Save your settings.
WP Cerber also lets you block entire countries from the login page, limit login attempts, and enable two-factor authentication — all from the same settings screen.
Option B: Wordfence Security (Best If You Already Use Wordfence)
If your site already runs Wordfence, you can use its firewall rules to restrict admin access by IP without installing another plugin.
How to set it up:
- Go to Wordfence → Firewall → Blocking.
- Click Advanced Blocking.
- Enter the IP ranges you want to block (everyone except your allowlisted IPs) and apply the rule.
Wordfence’s blocking approach is less direct than a pure allowlist, it blocks specific ranges rather than restricting to approved-only. For the strictest possible protection, the .htaccess method or WP Cerber’s allowlist gives you cleaner control.
| Method | Technical Skill Required | Works On | Best For |
|---|---|---|---|
.htaccess | Low–Medium | Apache hosts | Most shared hosting users |
nginx.conf | Medium | Nginx/VPS | Cloud and managed VPS setups |
| WP Cerber Plugin | Low | All hosts | Non-technical users, fine-grained rules |
| Wordfence Plugin | Low | All hosts | Sites already using Wordfence |
What to Do If You Lock Yourself Out {#locked-out}
Getting locked out of your own admin panel happens. Here is how to recover quickly without panic.
Option 1: Fix it via FTP or File Manager,
Connect to your server via FTP or your host’s cPanel File Manager. Navigate to /wp-admin/ and delete (or rename) the .htaccess file you created. You can access your admin panel again immediately.
Option 2: Edit via SSH
If you have SSH access, you can remove the restriction in seconds:
rm /var/www/html/wp-admin/.htaccessOption 3: Contact your host
Most hosts can restore files or grant emergency access to your file system through their support team if you are completely locked out.
How to Handle a Dynamic IP Address {#dynamic-ip}
Most home internet connections use a dynamic IP address that changes when your router reconnects or after your ISP’s lease period expires. This is the biggest practical challenge with IP allowlisting
Here are the three strategies we recommend:
Strategy 1: Use your office or business IP (static)
Business internet connections almost always come with a static IP address. Allowlist your office IP and manage WordPress remotely from there when you need admin access.
Strategy 2: Allowlist a VPN with a fixed IP
Subscribe to a VPN service that offers dedicated static IP addresses (Surfshark, NordVPN, and ProtonVPN all offer this as an add-on). Connect to the VPN before accessing your admin panel, and allowlist that static IP.
Strategy 3: Allowlist your IP range (less strict but more flexible)
Your ISP typically assigns IPs from a limited block. You can allowlist a /24 subnet (e.g., 203.0.113.0/24) to cover the full range your ISP uses for your area. This is less secure than a single IP but far better than no restriction.
# Allow entire subnet instead of single IP
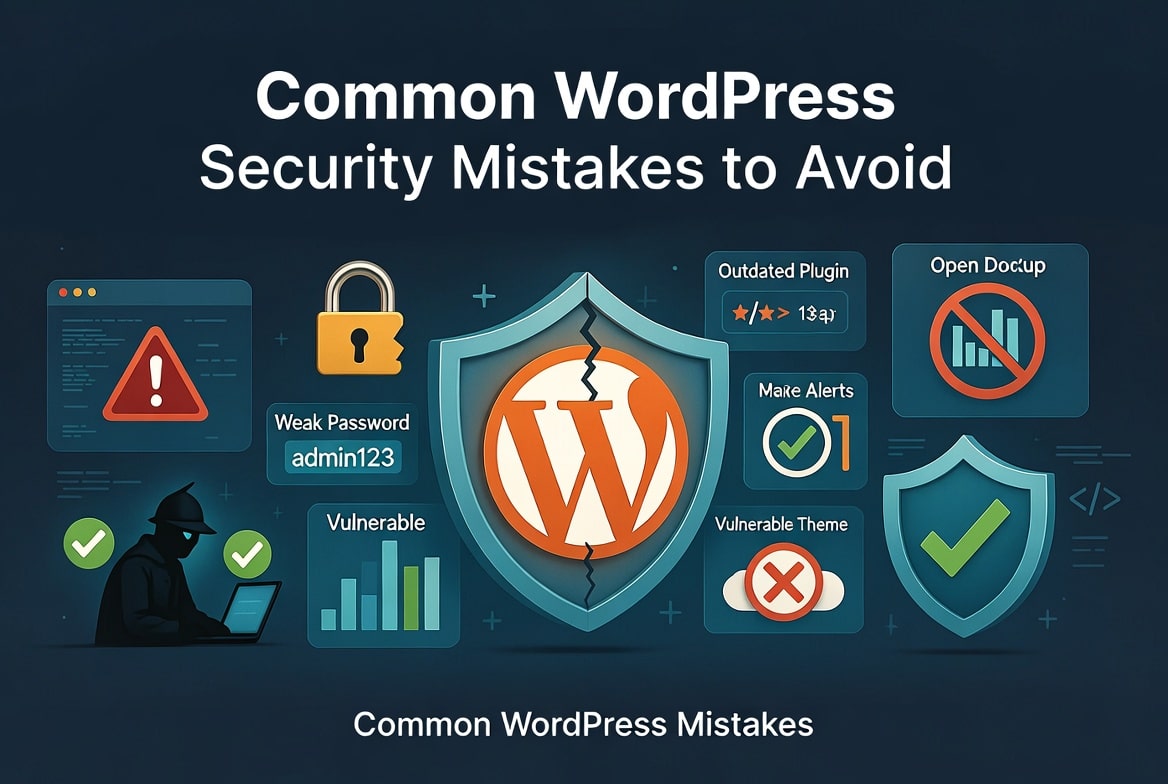
allow from 203.0.113.0/24Common Mistakes to Avoid
| Mistake | Why It Causes Problems | How to Avoid It |
|---|---|---|
Not backing up .htaccess before editing | A syntax error can take your whole site down | Always download a backup first |
Forgetting to also protect wp-login.php | Attackers bypass /wp-admin and hit the login file directly | Add <Files wp-login.php> rules to root .htaccess |
| Not testing immediately after applying rules | You won’t know if you’re locked out until it’s too late | Open your admin panel in a new browser tab right after saving |
| Using a dynamic IP without a fallback plan | Your IP changes and you lose admin access | Pair this method with a static VPN IP or staging-first testing |
Blocking admin-ajax.php | Breaks front-end features that rely on AJAX calls | Use the /wp-admin/.htaccess approach, not root-level blocks |
Frequently Asked Questions
Does IP allowlisting replace two-factor authentication?
No — and we do not recommend treating it as a replacement. IP allowlisting and two-factor authentication (2FA) solve different parts of the security problem. IP allowlisting limits who can reach your login page. 2FA limits who can pass your login page even after reaching it. Use both together for the strongest defense.
What if I have a team that works from many locations?
For distributed teams, a VPN with a shared static IP is the cleanest solution. Every team member connects to the VPN before accessing the admin panel, and you allowlist that single VPN IP. Alternatively, tools like Cloudflare Access let you control admin access by identity (email login) rather than by IP alone, which suits fully remote teams better.
Does this affect regular visitors to my site?
No. IP allowlisting on /wp-admin and wp-login.php only affects access to the admin area. Your site’s front end remains fully accessible to all visitors.
Does this work if I use a CDN like Cloudflare?
Cloudflare and other CDNs route traffic through their own servers, which means your server sees Cloudflare’s IP addresses instead of your visitors’ real IPs. If you use Cloudflare, you need to restore real visitor IPs using Cloudflare’s mod_remoteip settings, or manage the restriction through Cloudflare’s own firewall rules (Cloudflare Access or WAF rules) rather than .htaccess.
Can I allowlist an entire country instead of specific IPs?
Not with the .htaccess method alone. it only works with individual IP addresses and subnet ranges. Country-level blocking requires a security plugin like WP Cerber or Wordfence, or a server-level solution like Cloudflare’s WAF, which can block or allow traffic by geographic location.
Locking down your WordPress admin area with IP allowlisting takes less than 15 minutes and immediately eliminates an entire class of attacks against your site. Combined with strong passwords, two-factor authentication, and regular backups, it forms the foundation of a security posture that stands up to the most common WordPress threats.
If you found this guide helpful, you may also want to read our posts on how to disable XML-RPC in WordPress and how to add two-factor authentication to your WordPress login page.


Leave a Reply